

This is an update to a previous post from 2019. YouTube now will automatically create your subtitles for you. But if you download your video from YouTube, the subtitles do not come with the video. You have to download them separately.
You can still work on the timing in Creator Studio. Here’s the steps to get there:
- Login to your YouTube account, and click on Your Channel from the top right drop down.
- Click on one of your videos, then you will see a blue Edit Video button to the bottom right. Click on it.
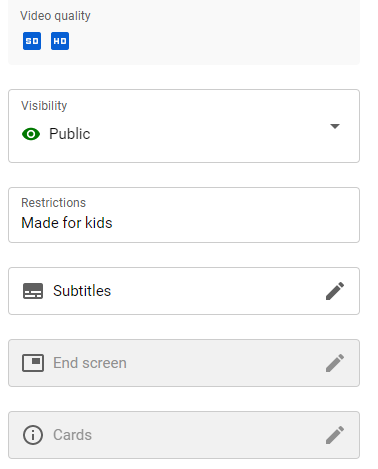
- There should be a Subtitle box on the right side with an edit pencil – click on it.
- You can then adjust the timing with the verbiage and also correct typos and punctuation. When you are finished, click the Done button.
- Then click the Subtitles link on the left side of the screen.
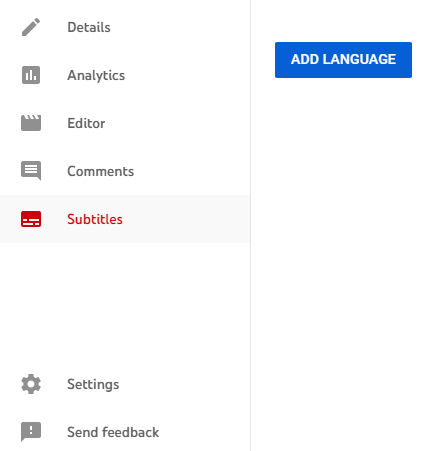
- ON the right side of the screen beside the Edit button, click 3 vertical dots, and choose download. Download the file in .srt format. The file will download and be called captions.srt.
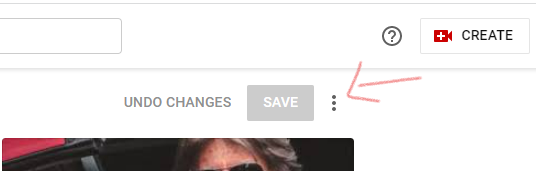
- Also, download the video – Click Details on the left.
- Above the video on the right side you will see Undo, Changes and 3 dots. Click the 3 dots and then download your video.
- Name both the captions.srt file and the video the same name – such as myvideo.srt and myvideo.mp4 and save in the same folder.
- From here, the directions should still work here for How to Embed Transcription in a Video for Instagram (free account works best for videos under 5 minutes) OR, you can follow the instructions below for VLC.
Embed Subtitles using VLC
- Install VLC Media Player on your computer.
- Now that you have your captions and video from the above instructions, open VLC.
- Click on “Media -> Convert/Save.”
- Click on the “+ Add” button and browse for the video file you want to burn the subtitles overlay into.
- Check the “Use a subtitle file” checkbox and browse for the subtitle file you wish to embed.
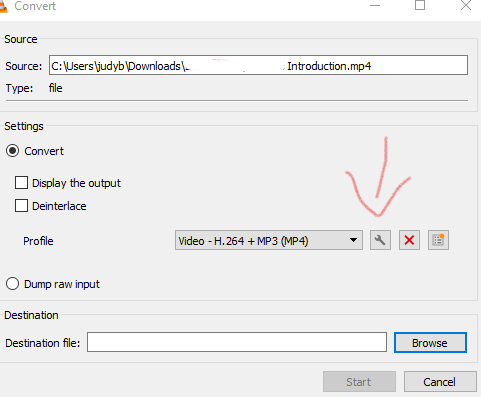
- Click on “Convert/Save” button; not on the little downward arrow
- In the next window, beside “profile”, there is a drop-down menu-box where you can choose what to convert your file to. I have mine set to:
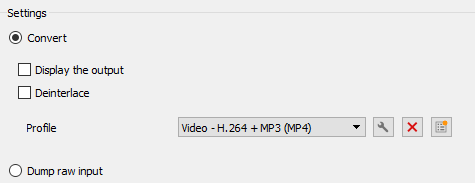
- Now click on the Wrench tool button.
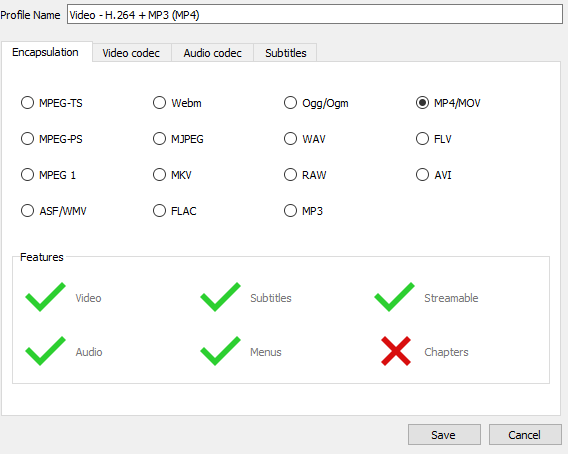
- Make sure the ‘Encapsulation’ option you have chosen checks the “Subtitles” property but it should already be checked if you linked to your srt file.
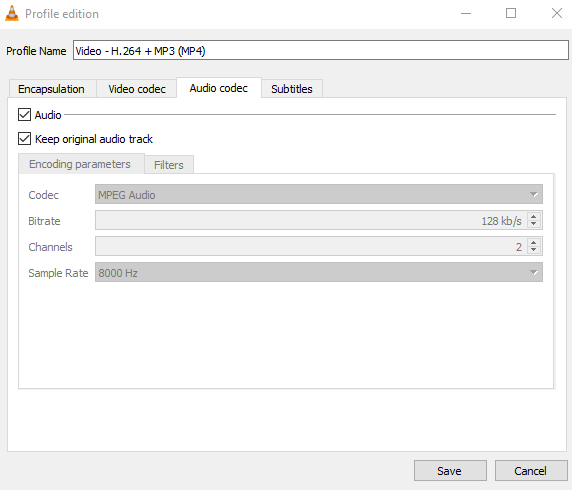
- Click on the Audio codec and “Keep original audio track” or your audio will not be saved/converted.
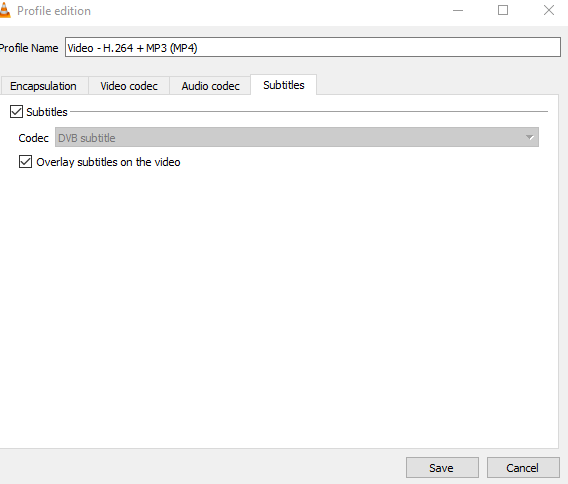
- Click on the “Subtitles” tab, check “Subtitles” then “Overlay subtitles on the video” checkbox. Then click “Save.”
- Back to the “Convert” window, search “Destination file:” at the bottom and click on “Browse” to choose where to save the new file and rename it something new.
- So, once you’ve chosen where to save it and how to name it, click “Save”.
- Back to the ‘Convert’ window again, click ‘Start’ and wait few minutes/seconds for the video to convert and export.